Keersten from Leap Into Art
Hi there! I am Keersten from Leap Into Art. I am an art teacher
and mommy to 3 crazy little girls. (Yes, we are swimming in pink at our house!) I share art projects to do with your kids and sometimes by yourself, along with our girlie adventures and some of my favorite recipes.
I think the holidays are a time when we are all feeling a little lean (at least in the wallet--I can only hope for the skinny jeans!) So, here are 3 ways to trim your table without shelling out much green. First of all, take a look around at what you have in your cupboards and start imagining a way to work with what you've already got. Serving trays and bowls are great, baskets and even cups and mugs can make a great foundation for a fun centerpiece. Here are a few tips to keep in mind:
- Keep it simple-the food and the company should be the stars of this
meal, your awesome table is the whipped cream on your pie. - Let the conversation flow-tall centerpieces make it hard for people
to see each other and lively debate is what will make the dinner fun.
Keep it under 12", but lower than that is certainly better. - Make it yours-don't be a slave to tradition or seasonal stereotypes.
If you don't want pumpkins or fall leaves, then leave them off the
table, these ideas will certainly translate to other objects. If you've
always wanted your own cornucopia, then by all means, go for it! - Keep it in proportion-don't forget to leave room on the table for
the meal. - Lessen the stress-I'd like to embroider this on a pillow and have
someone repeatedly hit me with it during the prep for big events like
Thanksgiving. It doesn't have to be perfect. No one expects it to be and
only you will notice that it isn't the magazine picture that you see in
your head. Your friends and family are there to be together. The meal
you are working so hard on will be eaten and gone, the table will be
cleared away; but what will last is the memory. So take a deep breath,
laugh at the things that go wrong and try to enjoy yourself (because
isn't that more fun for everyone anyway?) Okay, now the ideas:
refresh the traditional:
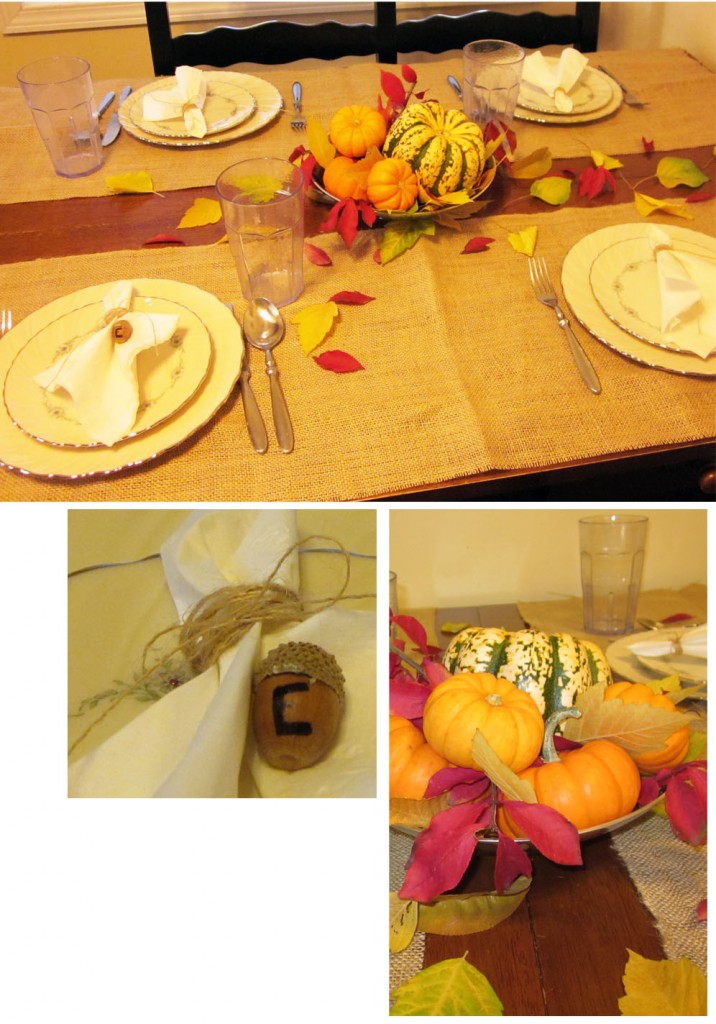
You can't go wrong keeping it classic. One of the best things about using a traditional scheme is how easy and inexpensive it can be to create something fun. Once you have found possible containers, head to the produce section and grab a few mini pumpkins and gourds. Take a nature walk with a grocery sack to get the rest of your frills. Autumn leaves, branches with berries, nuts and acorns can be found all over and will come together to give you the perfect palate to set off that big bird on the platter.
I love to break away from the expected table cloth; it's a great way to give instant interest. Cut a length of burlap in half or thirds to make a couple of table runners. (Thin enough to leave a strip of the table surface showing in the center.) You can pull a few threads out to fringe the edges. Line them with the outside edges of the table to make essentially a table long place mat. Then set out your bowl or basket and arrange the gourds inside, now fill it in with leaves.
You can tie napkins with some twine and lay them on the plates with an acorn "place card." (Just use a Sharpie with a good point to write the initial or first name of your guests on an acorn.)
get crafty:
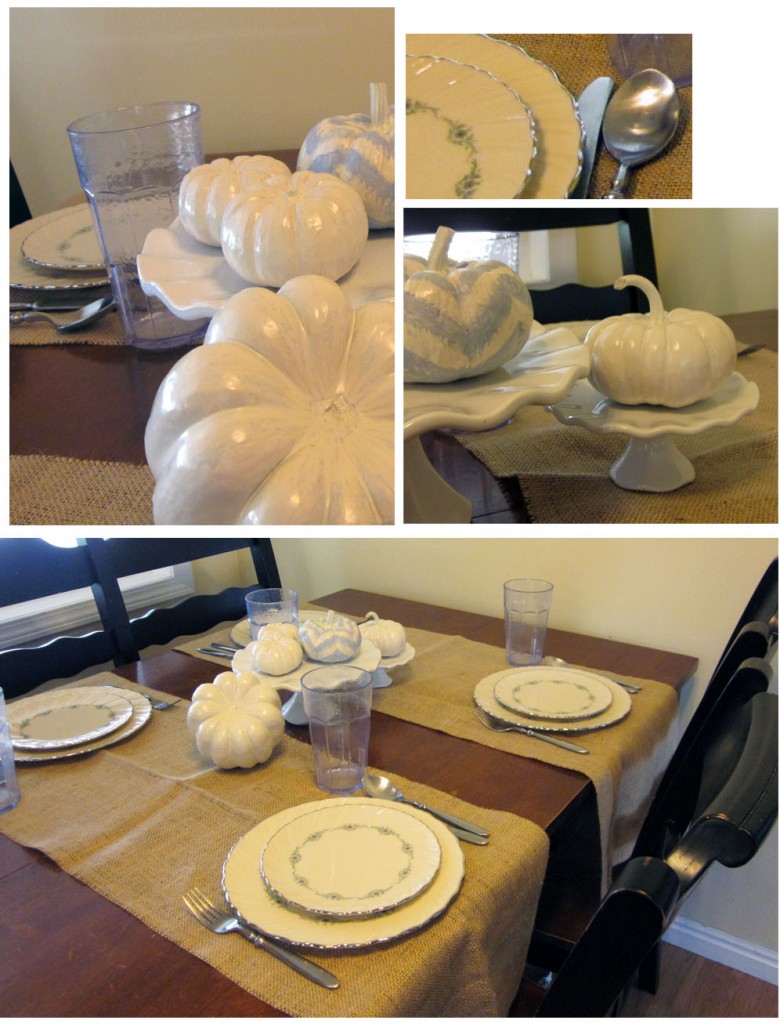
After you have picked up some pumpkins and found something to display them on; you can get to work setting your own personal style on the table. Here I have spray painted the gourds with ivory then added chevrons to one of the pumpkins. To give it a distressed look, I used acrylic craft paint and kept the brush dry, adding only a little paint to the brush at a time. To make the chevrons, simply slant a line diagonally across each section of the pumpkin, up then down, up then down, etc. This technique would also work well with other colors of paint. You could do a variety of colored strips and polka dots to create a whimsical kid-inspired table.
I cut burlap into long strips and laid them across the table for each place setting. This looks great in several fabrics and is a unique way to create something more interesting (and less expensive-yay!) than a place mat. You could also lay wide strips of ribbon running both ways on the table to give it flare.
go glam:
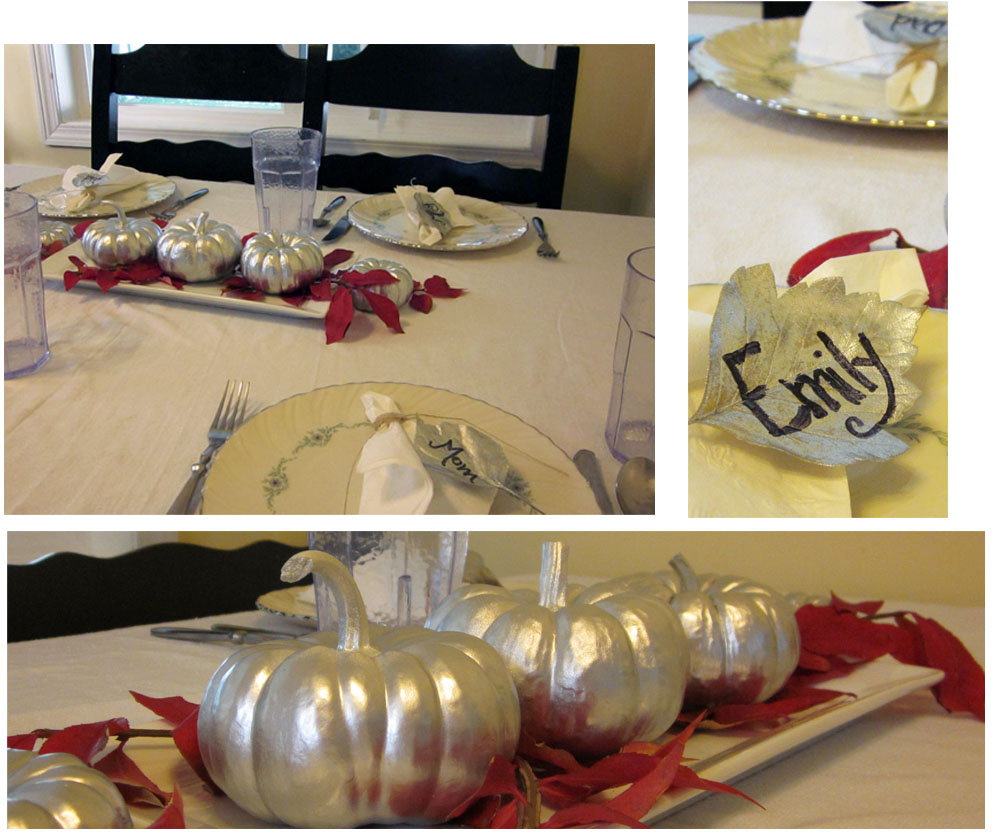
Following the same technique as above, spray the pumpkins with a couple of layers of metallic spray paint. Keep the overall arrangement fairly simple, adding one or two colors of fall leaves or nestling the pumpkins in with votive candles. This arrangement will definitely be memorable!
You could also add some glitter if you like to take it over the top.
Spray leaves with the same shade of spray paint and write your guest's names with a sharpie to create a fun place card. It is best to use leaves that are still supple for this and do it no more than a few days
before the feast so they don't crumble when handled. Whatever you choose to do, enjoy! That is what the day is all about.


Love the chevron stripe pumpkin!
ReplyDeletefun ideas. Plus they don't look too difficult.
ReplyDelete